I intended to tear down the entire layout however the demolition of the original Hudson Point & Hawthorne stopped at the back wall. There were several reasons for this. I had the new floor to put in, the track lighting to rearrange, panelling, electrical (see the wire under left side rear). But perhaps the most significant reason was that I ran out of storage space for the chunks I would want to save. If I kept going, it would be straight to the dumpster. I just couldn't bring myself to do that, although quite a bit has already gone in the dumpster. The photo below shows the bit I didn't rip out and the wide open space for the new benchwork.
Most, if not all, of this last bit may get ripped out when I recoup some of my storage. So, it's a temporary reprive. The photo below is looking toward the back.

The below photo is looking toward the front. My goal was to have totally legless benchwork. Absent any legs, I could put two more cars in front of these although I'd have to put two in the driveway to run the railroad. I screwed sheets of paneling into a 2x3 that is bolted to a ceiling joist. The bottom edge of the paneling is screwed to the 1x3 and 1x4 benchwork frame. So this section mostly hangs from the ceiling. The right side is connected to the side wall so it is rock solid. The left side (over the yellow car) is NOT connected to the wall so I can walk down that side of the building. That end did sway fore and aft when this picture was taken. At this point the two legs are holding up the end but providing zero lateral support. 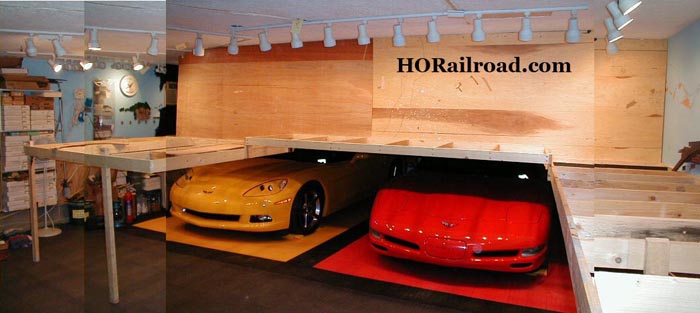
In the photo below I have installed another vertical panel, this one 90 degrees rotation from the side to side panels. This too is screwed to a 2x3 bolted to structural ceiling. The result was amazing. The benchwork does not sway left, right, nor does it sway for and aft. As you can see below I was able to remove the legs. One small problem: The two outer most corners "balance" on the center support. So, putting weight on one corner tended to lift the opposite corner. Hmm... I could have fixed it with more bracing above but did not want to sacrifice the scenery and accessiblity to the railroad.
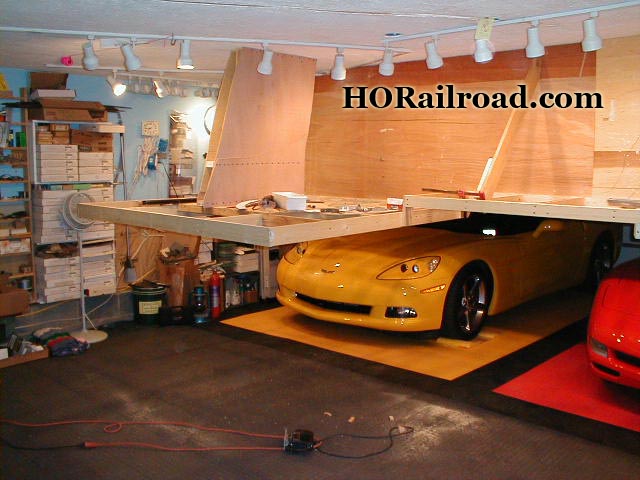
Below is the compromise. I put in two legs and set them back about a foot from each edge. No wobble at all. If I ever decide to put another car under here in front of the yellow car (Well, you never know) I can run some steel wire from the celing to the corners. There are no legs and plenty of space in front of the red car so I could still park a car there like in the July '07 Model Railroader track plan.
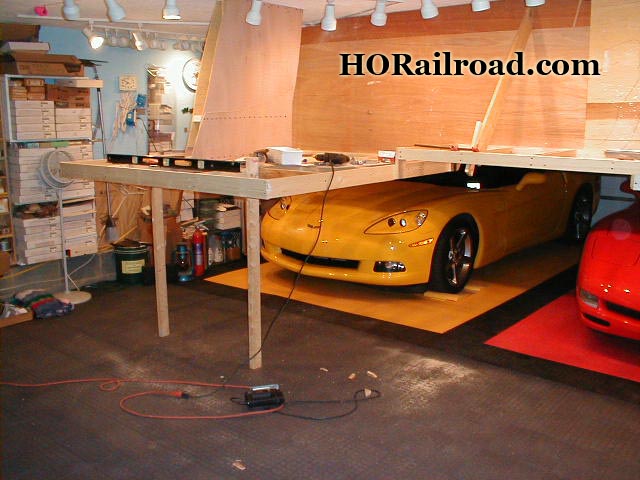
I took a break in October to build a display for Model Railroad Month so nothing got done here for a month. But by November splines had been ripped from 1x4's and as shown below the mainline is going in. The spot shown below is the left most corner in front of the yellow car.
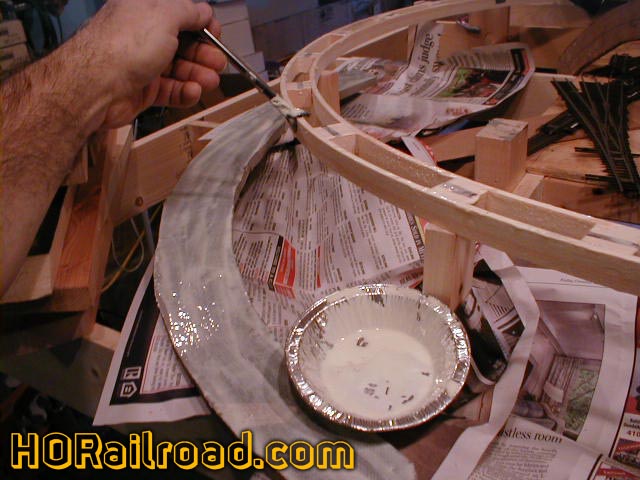
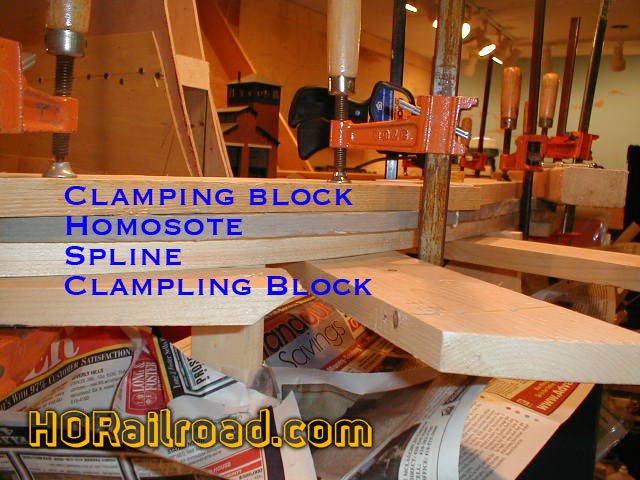
The shot below shows the glued homosote over the splines. Then boards are laid on top and blocks go on the bottom. Clamps then squeeze it all together and the long boards on top keep it all flat. The blocks on bottom give the clamp a place to grab across to bottom of the splines.
I'd like to do another Online Clinic for splines but for now work continues daily on the railroad.
More to come.


